

How to Conduct Annual Heavy Maintenance
As each school year winds down, fleets should focus on heavy maintenance — scrutinizing every bus and replacing or repairing worn components. Doing so can prevent breakdowns and avoid liability.
Another school year has come to an end, and a new year is nearing. The issues dealt with and accomplishments made during the past year will help us prepare for the upcoming year.
I look forward to using new skills and knowledge, then applying what I’ve learned to deal with future challenges. I’ve used the past spring and summer seasons as a time to accomplish heavy maintenance in my fleet. In this article, I’ll provide details on what heavy maintenance entails, how it should be conducted and why it is critical.
Heavy maintenance must be performed for any operation to continue to run smoothly, while leaving only minor repairs and routine service work to perform during the bulk of the coming school year.
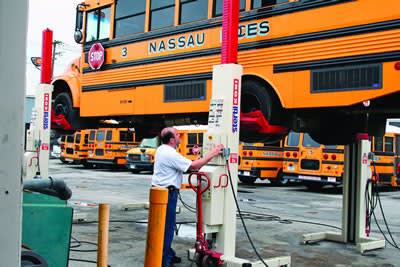
Heavy maintenance includes inspecting each bus with deep scrutiny, paying attention to every detail on the body and chassis, then replacing, rebuilding or repairing any questionable component that shows any sign of significant wear.
Ensure component reliability
As you visually and physically inspect each item on the bus, keep in mind these two questions throughout the process: Will this component work as it was designed to for another 12 months? Or could this component be the root of a safety-related malfunction or breakdown during the same period?
No one can predict the exact lifespan of a component. However, one can take steps to ensure its extended reliability for a given period. This is accomplished by using good sense while pulling from past histories of known component life to make this prediction.
In the June issue, I discussed the meanings of the term “PM” (proactive maintenance and preventive maintenance). When performing annual heavy maintenance, you are performing proactive maintenance and preventive maintenance. I label the annual heavy maintenance performed in my shop “PM-D”. You may call it anything you wish, but the PM-D, as I will refer to it throughout the rest of the article, is defined as annual safety inspection and repairs and includes all the annual heavy maintenance previously described.
I have a checklist I use during this inspection that is signed by the technician performing the work after it is completed. His signature ensures that our insurance coverage will remove us from all risk of liability down the road. Without a signature, date and the completed checklist on record and filed someplace safe, it is as though the work was never performed. If I were to defend our actions in court, having this signed and dated checklist that itemizes all work performed, there is little chance action could be taken against our district, myself or any technician in the shop.
Every PM inspection and repair your staff performs should include an area that is initialed or signed by the technician performing the work, listing the date the work was performed, a full description of all work performed and any observations about the overall condition of any given component that may be of questionable condition.
Again, as I have stated in previous articles, remember the Three Cs in your documentation: complaint, cause and correction.
Inspect, repair, replace
There are two reasons for performing the PM-D. One is to inspect for safety, ensuring every safety-related component on the bus is in reliable, safe operating condition. The other is to repair or replace any component, safety related or not, that is in poor condition or that may be suspect of failing during the next 12 months.
The first part of the PM-D, the safety inspection, is fairly straightforward, and guidelines such as the National School Transportation Specifications & Procedures manual are available. If your fleet shop does not have a copy of this manual, it can be downloaded at no cost from the National Congress on School Transportation at www.ncstonline.org.
Within this manual are the national out-of-service criteria for school bus inspectors, which serve as an inspection guide for all bus technicians as well. The NSTSP guidelines should be the base of all safety-related work performed.
Other guides, such as your own state vehicle safety inspection program, the NAS (North American Standard), Federal Motor Carrier Safety Administration Section 396 and the commercial motor vehicle out-of-service criteria are available as well.
The second part of the PM-D, component repair or replacement, includes items of inspection that will reduce the chance of on-the-road mechanical malfunction as well as enhance the overall condition of all body/chassis features and components on every bus. This action restores the overall condition of the bus as near as possible to the condition it was in when new.
There are varying degrees in this second phase of work. I set a goal to perform the highest level that is the most detailed and complete PM as physically and fi nancially possible on my fl eet. You may be limited by some physical or fi nancial restrictions in your district, causing a reduced level of work to be performed. Some say they simply do not have the manpower to perform this type of PM. When I hear that statement, I wholeheartedly disagree. You cannot afford not to perform this PM, regardless of circumstances. Make it work the best you can. You may have to take longer to perform all the work or adjust existing priorities in order to get it accomplished. But it can be accomplished.
Thorough checking
What should be included on the PM-D checklist? I won’t cover every item on my checklist, but I want to explain the types of items one should inspect and give a few examples.
This inspection is broken down into specific areas covering the entire bus body and chassis. The body items include all driver controls, driver seating area, windows and glass, seats, etc., as well as all exterior body components.
There are many chassis items included in this inspection. I recommend starting the inspection just as you would a routine service inspection, but extra scrutiny needs to be given to every single item under the bus and on the chassis.
A visual inspection by itself will not suffice here. Feeling, pushing, pulling, shaking and squeezing are required. A component, such as a shock absorber, may appear to be in good working order when looking at it, but when you grab a hold of it and give it a good shake, you may find loose mounts or some other problem. Regardless of popular belief, shock absorbers do need to be replaced every three to five years on average — or sooner if you operate consistently on dirt or gravel roads.
Remember what I said in my last article? When replacing components that have like components mounted elsewhere on the bus, such as shock absorbers, brake chambers, headlights, brakes and so forth, always replace in pairs or sets.
Components that are severely corroded should be inspected closely and very likely will need replacing. This includes aluminum brake valves, chassis cross members, exhaust hangers, exhaust clamps and piping — even steel coolant piping that has become rusted.
Electrical connections must be inspected. All battery connections must be removed, and terminals and posts must be cleaned and reassembled, then given a protective coating.
When cables are disconnected from the batteries, take the time to connect a battery tester to each battery individually and test its capacity, and by all means, wash off the batteries and clean out the battery box. If batteries test marginal or bad and multiples of batteries are of the same age, it is wise to replace all of the batteries at the same time. There is always exception to the rule, however, so make sensible decisions on component replacements.
Inspect all chassis ground cables, wires and connectors that are exposed to the elements. Open the electrical junction box. Visually inspect all terminals and connections within. All must be clean and tight. Inspect components that ground internally or have external grounding wires to ensure mounting surfaces, fasteners and wire connections are clean and tight.
Lengthy process
A PM-D, if performed properly, should take eight to 12 hours to complete. It may take much longer, depending on the overall condition of the bus.
If you have not performed an annual inspection and repair before, the first year could be quite time consuming and more costly than you are accustomed to. Regardless of how costly repairs become, you should not cut corners. You will end up spending far more in the long run if you do.
If your budget is really tight, divide your fleet into groups by age of bus. Planning will allow you to perform this task on the oldest buses the first year, second oldest the second year, and so forth. But the ideal would be to get all buses on the same annual schedule.
Every effort should be made to perform this type of heavy PM on every bus once a year. You simply cannot ignore it. Planning and scheduling are the keys.
If you feel you cannot accomplish this PM with your fleet, I would be glad to assist in consultation and review of existing maintenance practices and to recommend a plan of action.
For a copy of my inspection checklist, e-mail me at bbarker@pcschools.us, topic “PM-D Checklist.”
Brad Barker is shop manager at Park City (Utah) School District and a member of SBF's editorial advisory board.
More Maintenance

Cummins on Smarter, Simpler Engine Innovation
Cummins discusses its first-ever gasoline engine for school buses, EPA 2027, and why bus fleets still want durable, simpler internal combustion options.
Read More →
Report: 72% of Diesel School Buses Now Use Advanced Low-Emission Engines
New data shows advanced low-emission diesel technology continues expanding across school bus fleets, even as electric bus adoption gains momentum.
Read More →
Vampire Tools' CAIMAN 7.5-Inch Multi-Purpose Screw Extractor Long-Nose Pliers with Crimper
Vampire Tools introduced the VAMPLIERS Caiman 7.5-inch multi-purpose pliers, combining screw extraction, cutting, crimping, and gripping functions into a single tool designed for fleet maintenance professionals.
Read More →
How Advanced Diagnostics Helps Bus Fleets Stay Ahead of Repairs
Chat with Noregon’s Kevin Smallhorn at ACT Expo about bus diagnostic tools, telematics integration, CNG maintenance support, and strategies to help reduce downtime and improve uptime.
Read More →
How School Bus Fleets are Getting Ahead of Breakdowns
Don’t let bus downtime wear you down. Here’s how bus operators are shifting from manual processes to AI-powered, data-driven maintenance systems for improved reliability and safety.
Read More →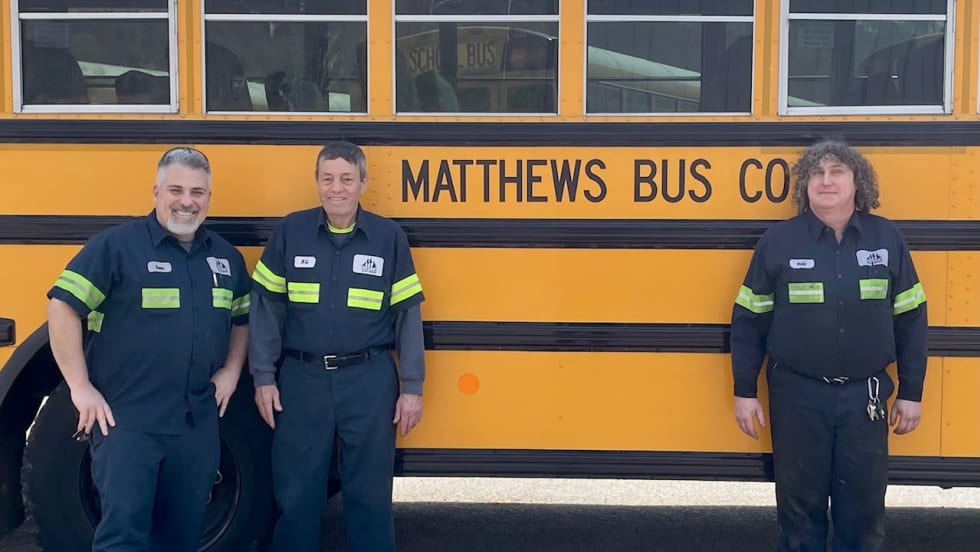
Pennsylvania School Bus Maintenance Team Praised for Dedication to Safety
Matthews Bus Company’s West Jefferson received a letter of commendation from the Pennsylvania State Police for their fleet inspections.
Read More →
2026 State of Student Transportation Report
Student transportation teams are being asked to do more with less, facing driver shortages, rising costs, and increasing safety expectations. This report uncovers how fleets are adapting, where technology is making the biggest impact, and why student ridership tracking is emerging as a top priority. Download the report to explore the key trends shaping 2026 and what they mean for your operation.
Read More →
From Chaos to Clarity: How School Districts Are Running Leaner Transportation Operations
Covering 38 routes on a Friday afternoon. Buses idling while routes overlap. Parents calling nonstop about late arrivals. Sound familiar? This whitepaper explores how district transportation leaders solved these exact problems — and what measurable results followed.
Read More →
The New Playbook for Safer, Smarter School Bus Maintenance
As school districts juggle aging buses, technician shortages and rising safety expectations, proactive fleet maintenance is becoming essential. This guide explores how telematics, predictive maintenance and real-time vehicle data can help transportation departments reduce breakdowns, extend vehicle life, improve compliance and keep students safer on the road.
Read More →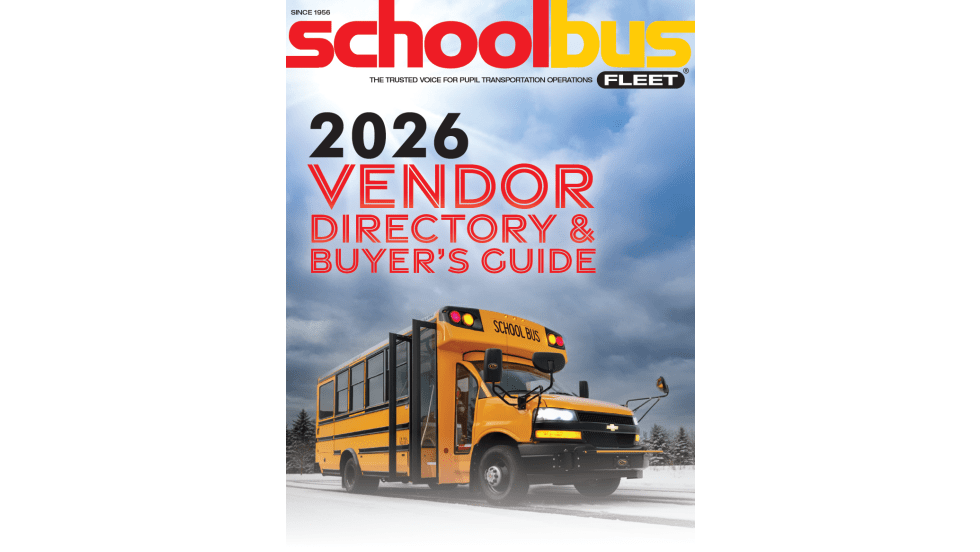
2026 School Bus Fleet Vendor Directory & Buyer's Guide
Searching for the right equipment, technology, or services for your school transportation program? This industry guide brings together manufacturers and suppliers across the entire school bus market, all in one place. Download it to find the partners who can help move your operation forward.
Read More →